Wireless Webcam
Personal Project
January 2024 - March 2024
January 2024 - March 2024
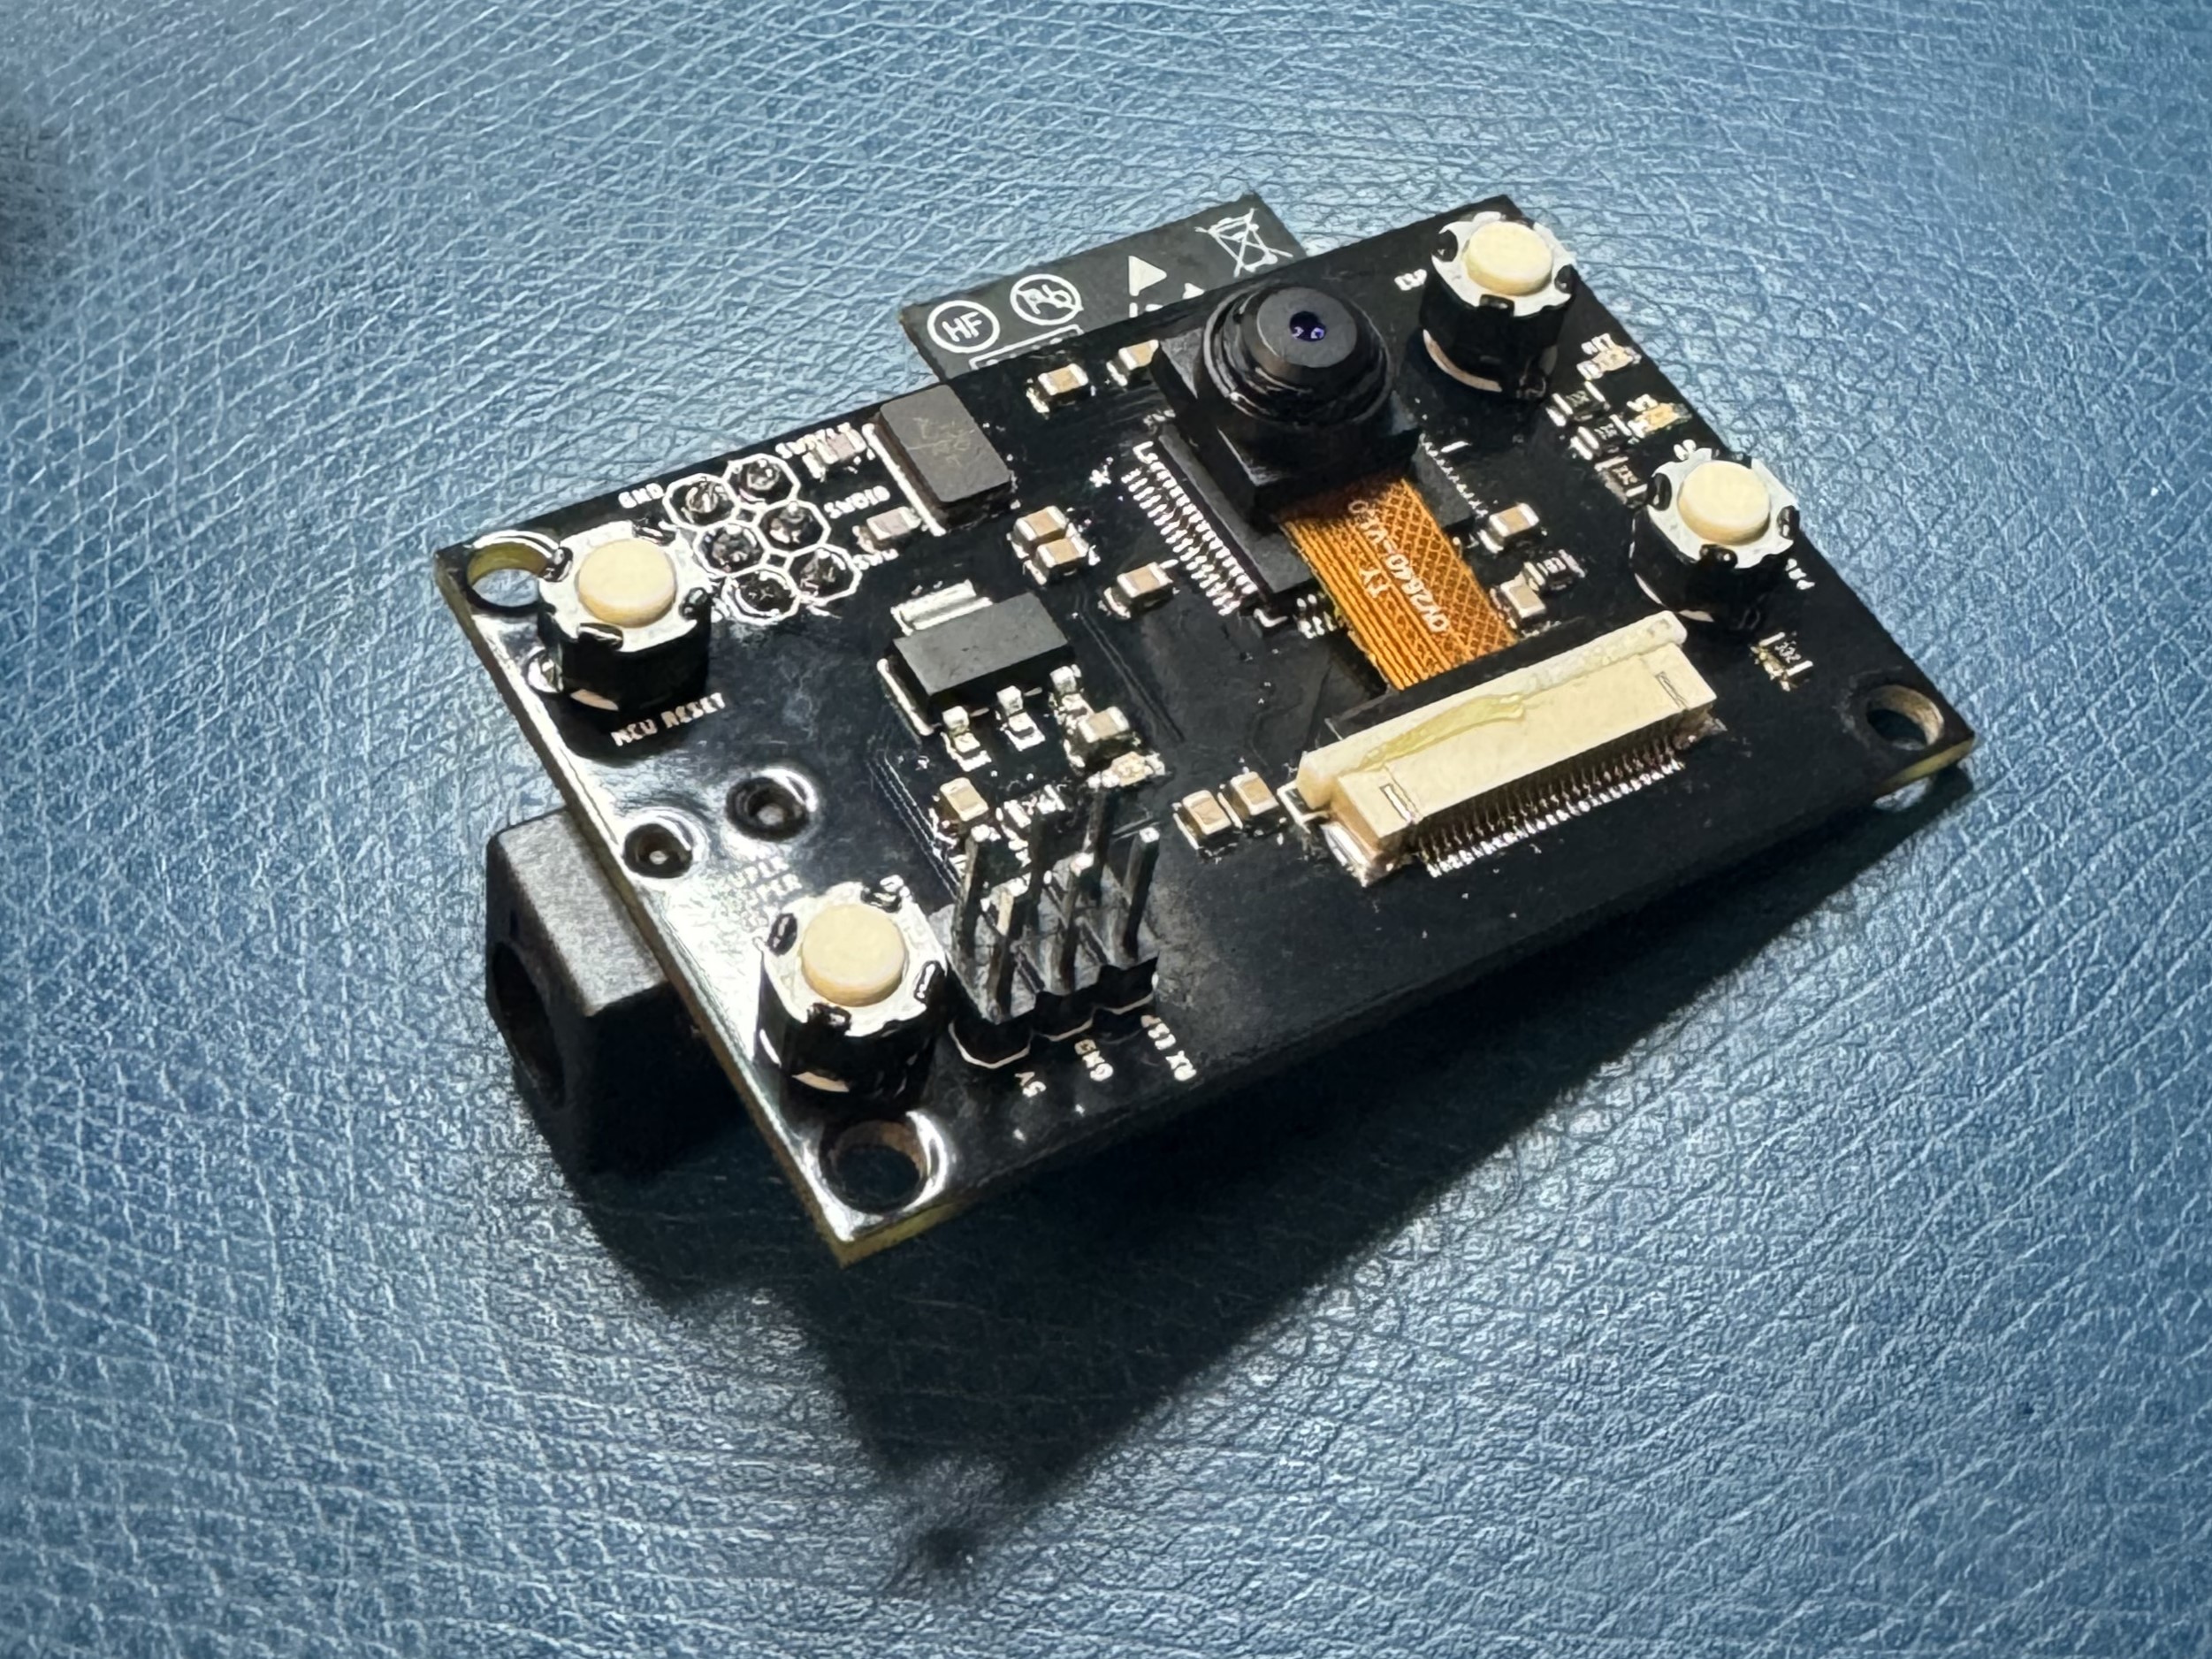 I created this web camera as a class project for Northwestern University,
where we were tasked with the full design and development of an embedded electronic device. My camera live-streams video to a
website at 480p at upwards of 20 fps. The device has two microcontrollers on board: the ATSAM4S8B and the
ESP32-WROOM-32E. The SAM chip handles image processing, while the ESP32
hosts a live web server to which the video is streamed.
I created this web camera as a class project for Northwestern University,
where we were tasked with the full design and development of an embedded electronic device. My camera live-streams video to a
website at 480p at upwards of 20 fps. The device has two microcontrollers on board: the ATSAM4S8B and the
ESP32-WROOM-32E. The SAM chip handles image processing, while the ESP32
hosts a live web server to which the video is streamed.
One of the primary challenges tackled was managing real-time data flow from the camera to the ESP32 module while ensuring that the system was
robust and efficient. The project required an abundance of low-level programming in C, PCB layout optimization, and mechanical design for enclosing the hardware securely. There are some design choices
that I ideally would have changed, but was unable to due to the short duration of the class. These changes will be discussed below.
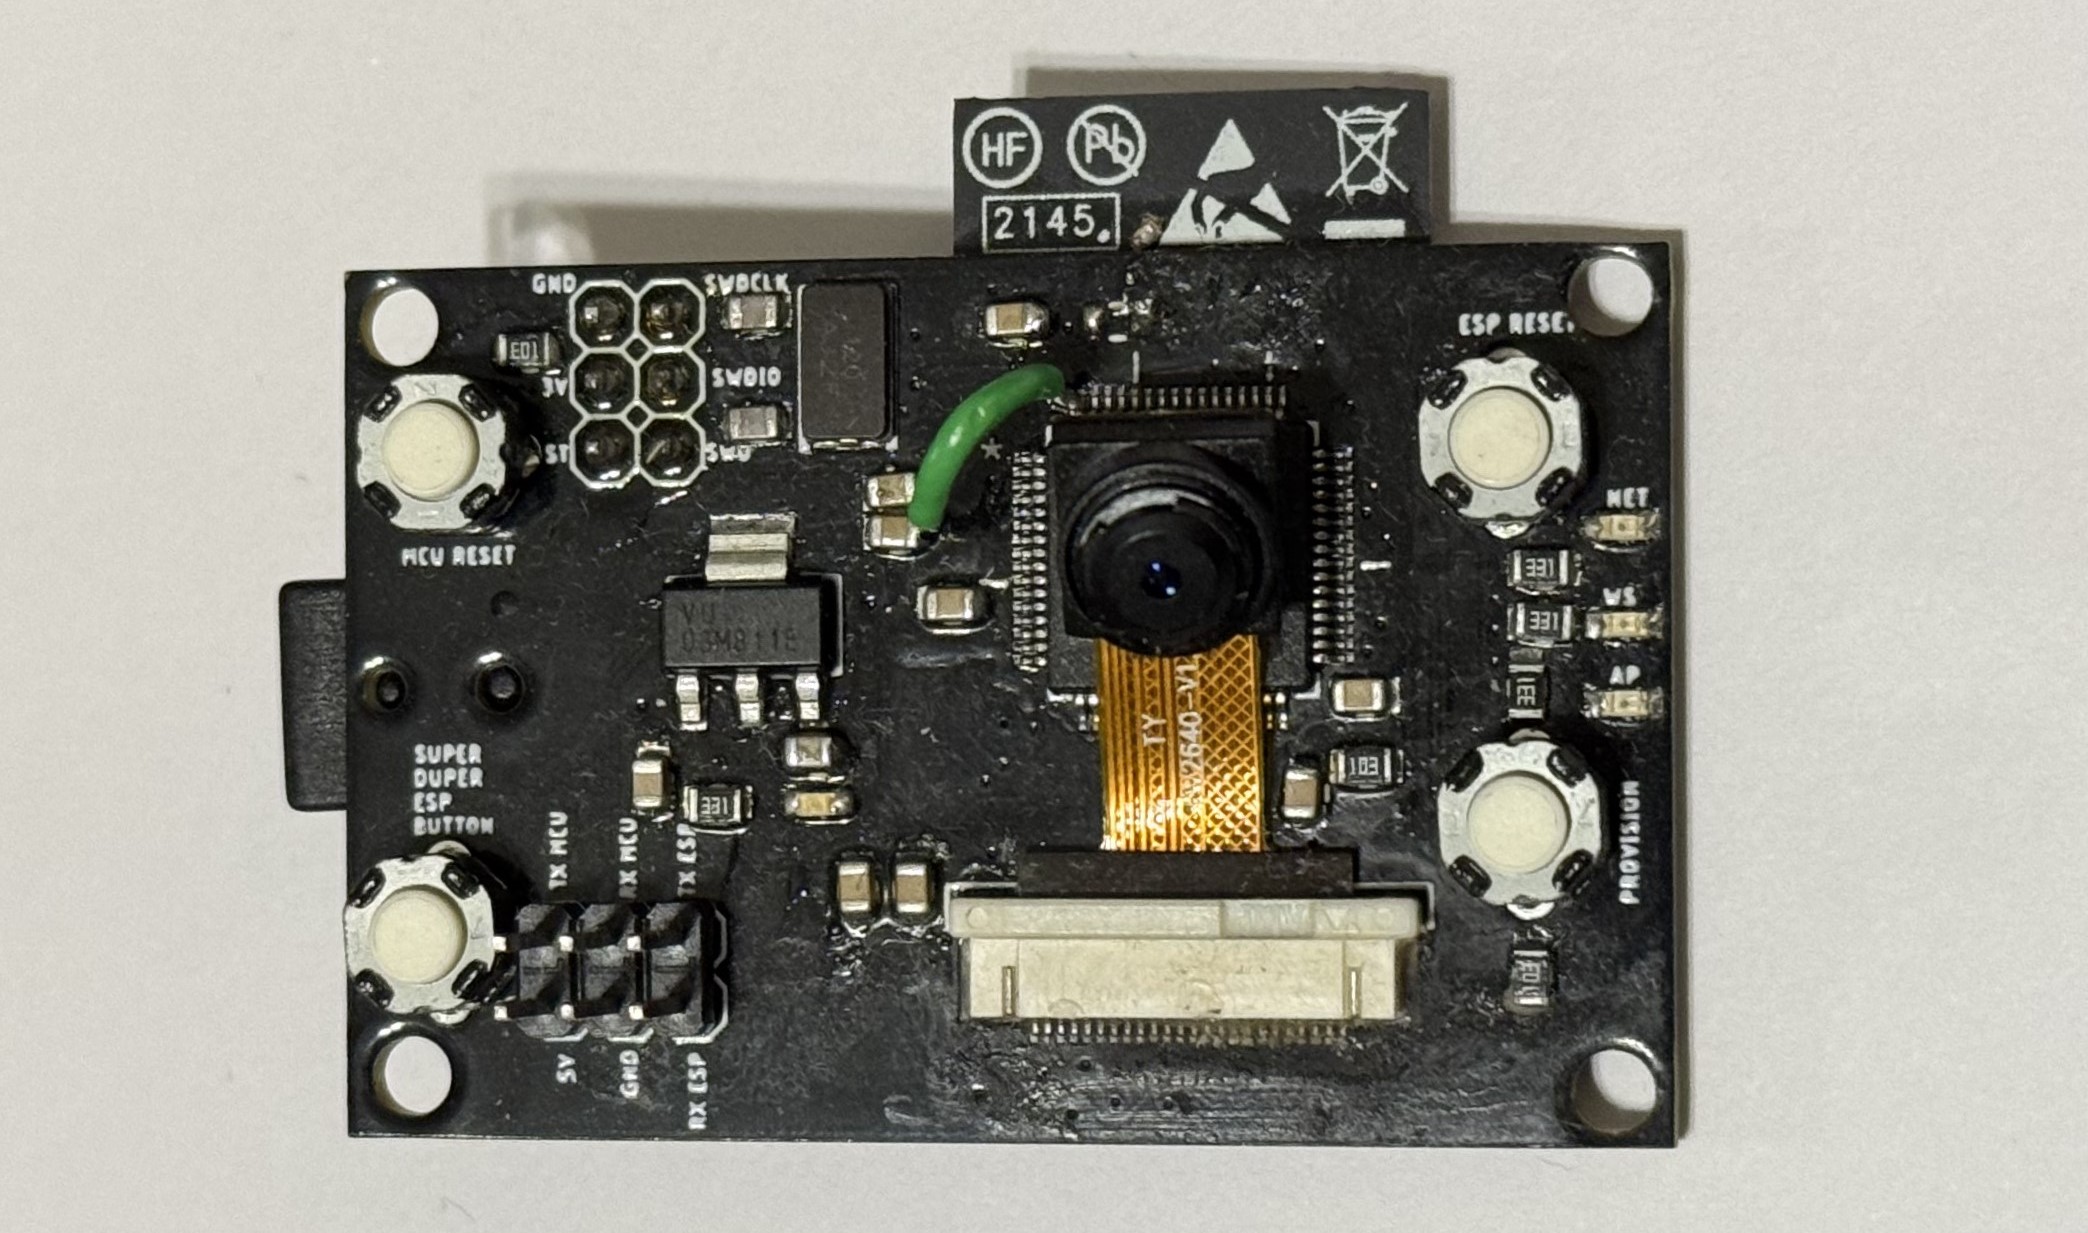 The main difficulty in this project was the design of the camera PCB, which integrates the ATSAM4S8B,
the OV2640 camera module, and the ESP32 for WiFi communication. I tried to keep the circuit board compact, while still being fairly easy to assemble.
The main difficulty in this project was the design of the camera PCB, which integrates the ATSAM4S8B,
the OV2640 camera module, and the ESP32 for WiFi communication. I tried to keep the circuit board compact, while still being fairly easy to assemble.
Special attention was given to routing high-speed SPI and UART signals between the MCU and the WiFi module. Separate ground planes were utilized to reduce noise, and bypass capacitors were placed near Vcc and power pins to act as a low pass filter. The PCB includes debug headers for USART and SPI communication, allowing real-time monitoring during firmware development.
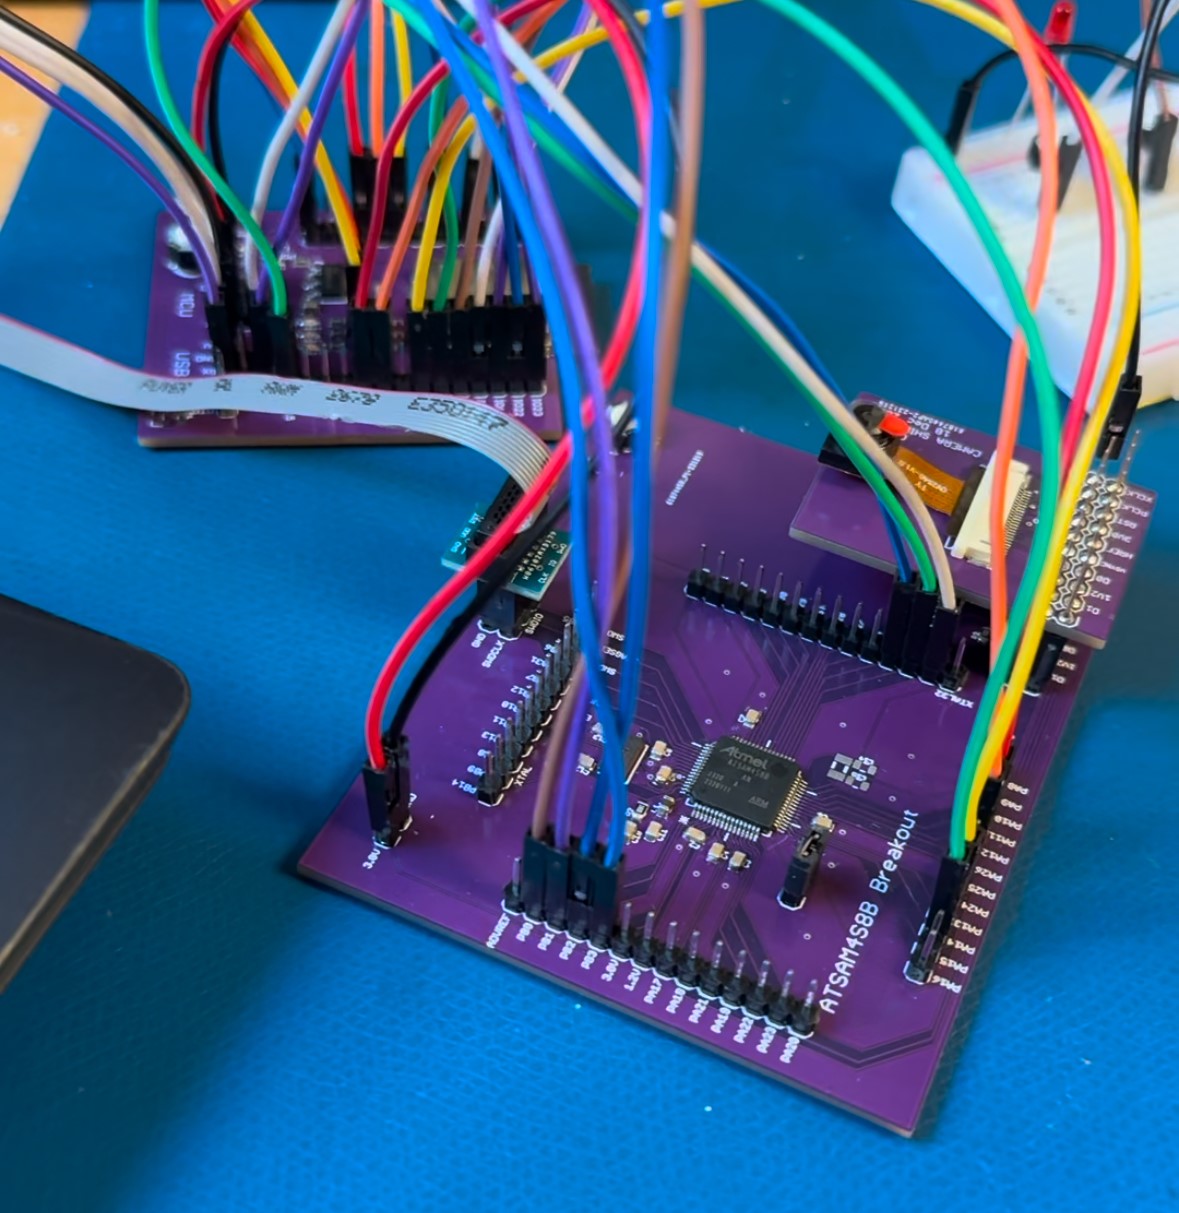
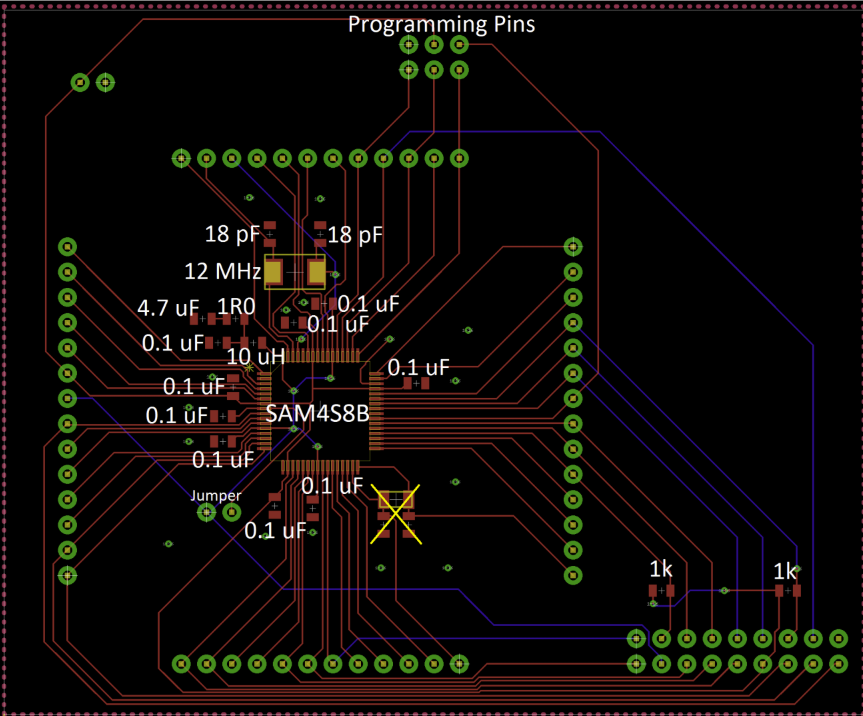 ATSAM4S8B Breakout Board Layout
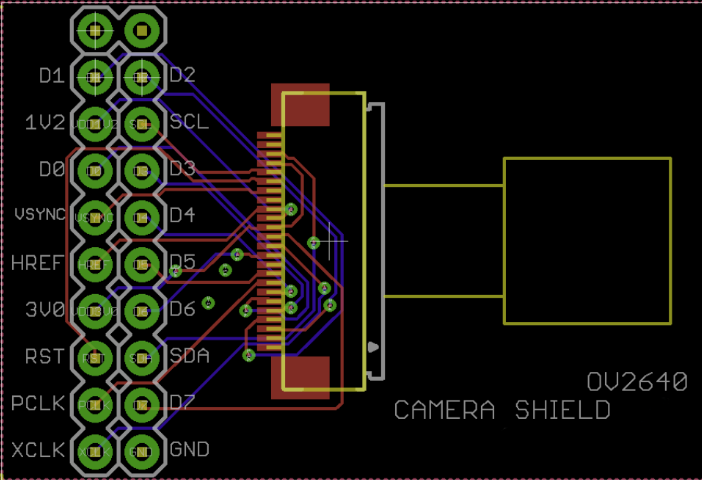 OV2640 Shield Layout
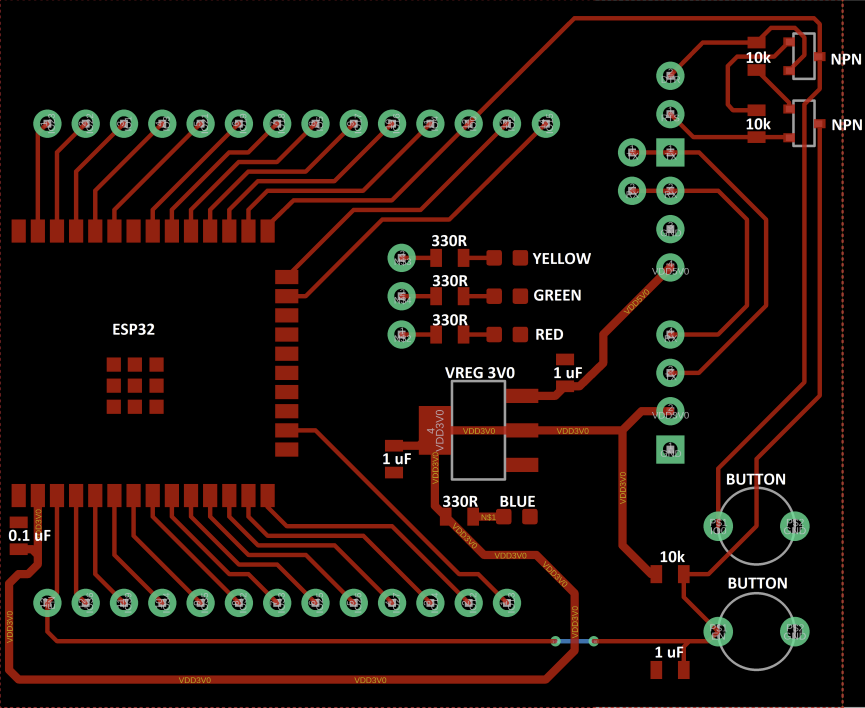 ESP32 Breakout Board Layout
To test the functionality of my circuits and microcontrollers before developing a production board, I created a handful of breakout boards which would allow me to quickly assemble the system with easy points for scoping. In total, I created a breakout board for each microcontroller as well as a shield for the camera. Once the circuits were validated, these boards allowed me to begin writing firmware for the MCUs in parallel with the design and manufacturing of the final circuit board, and I used them for the duration of the project. Below is a before and after comparison of the breakout boards and the final completed camera:
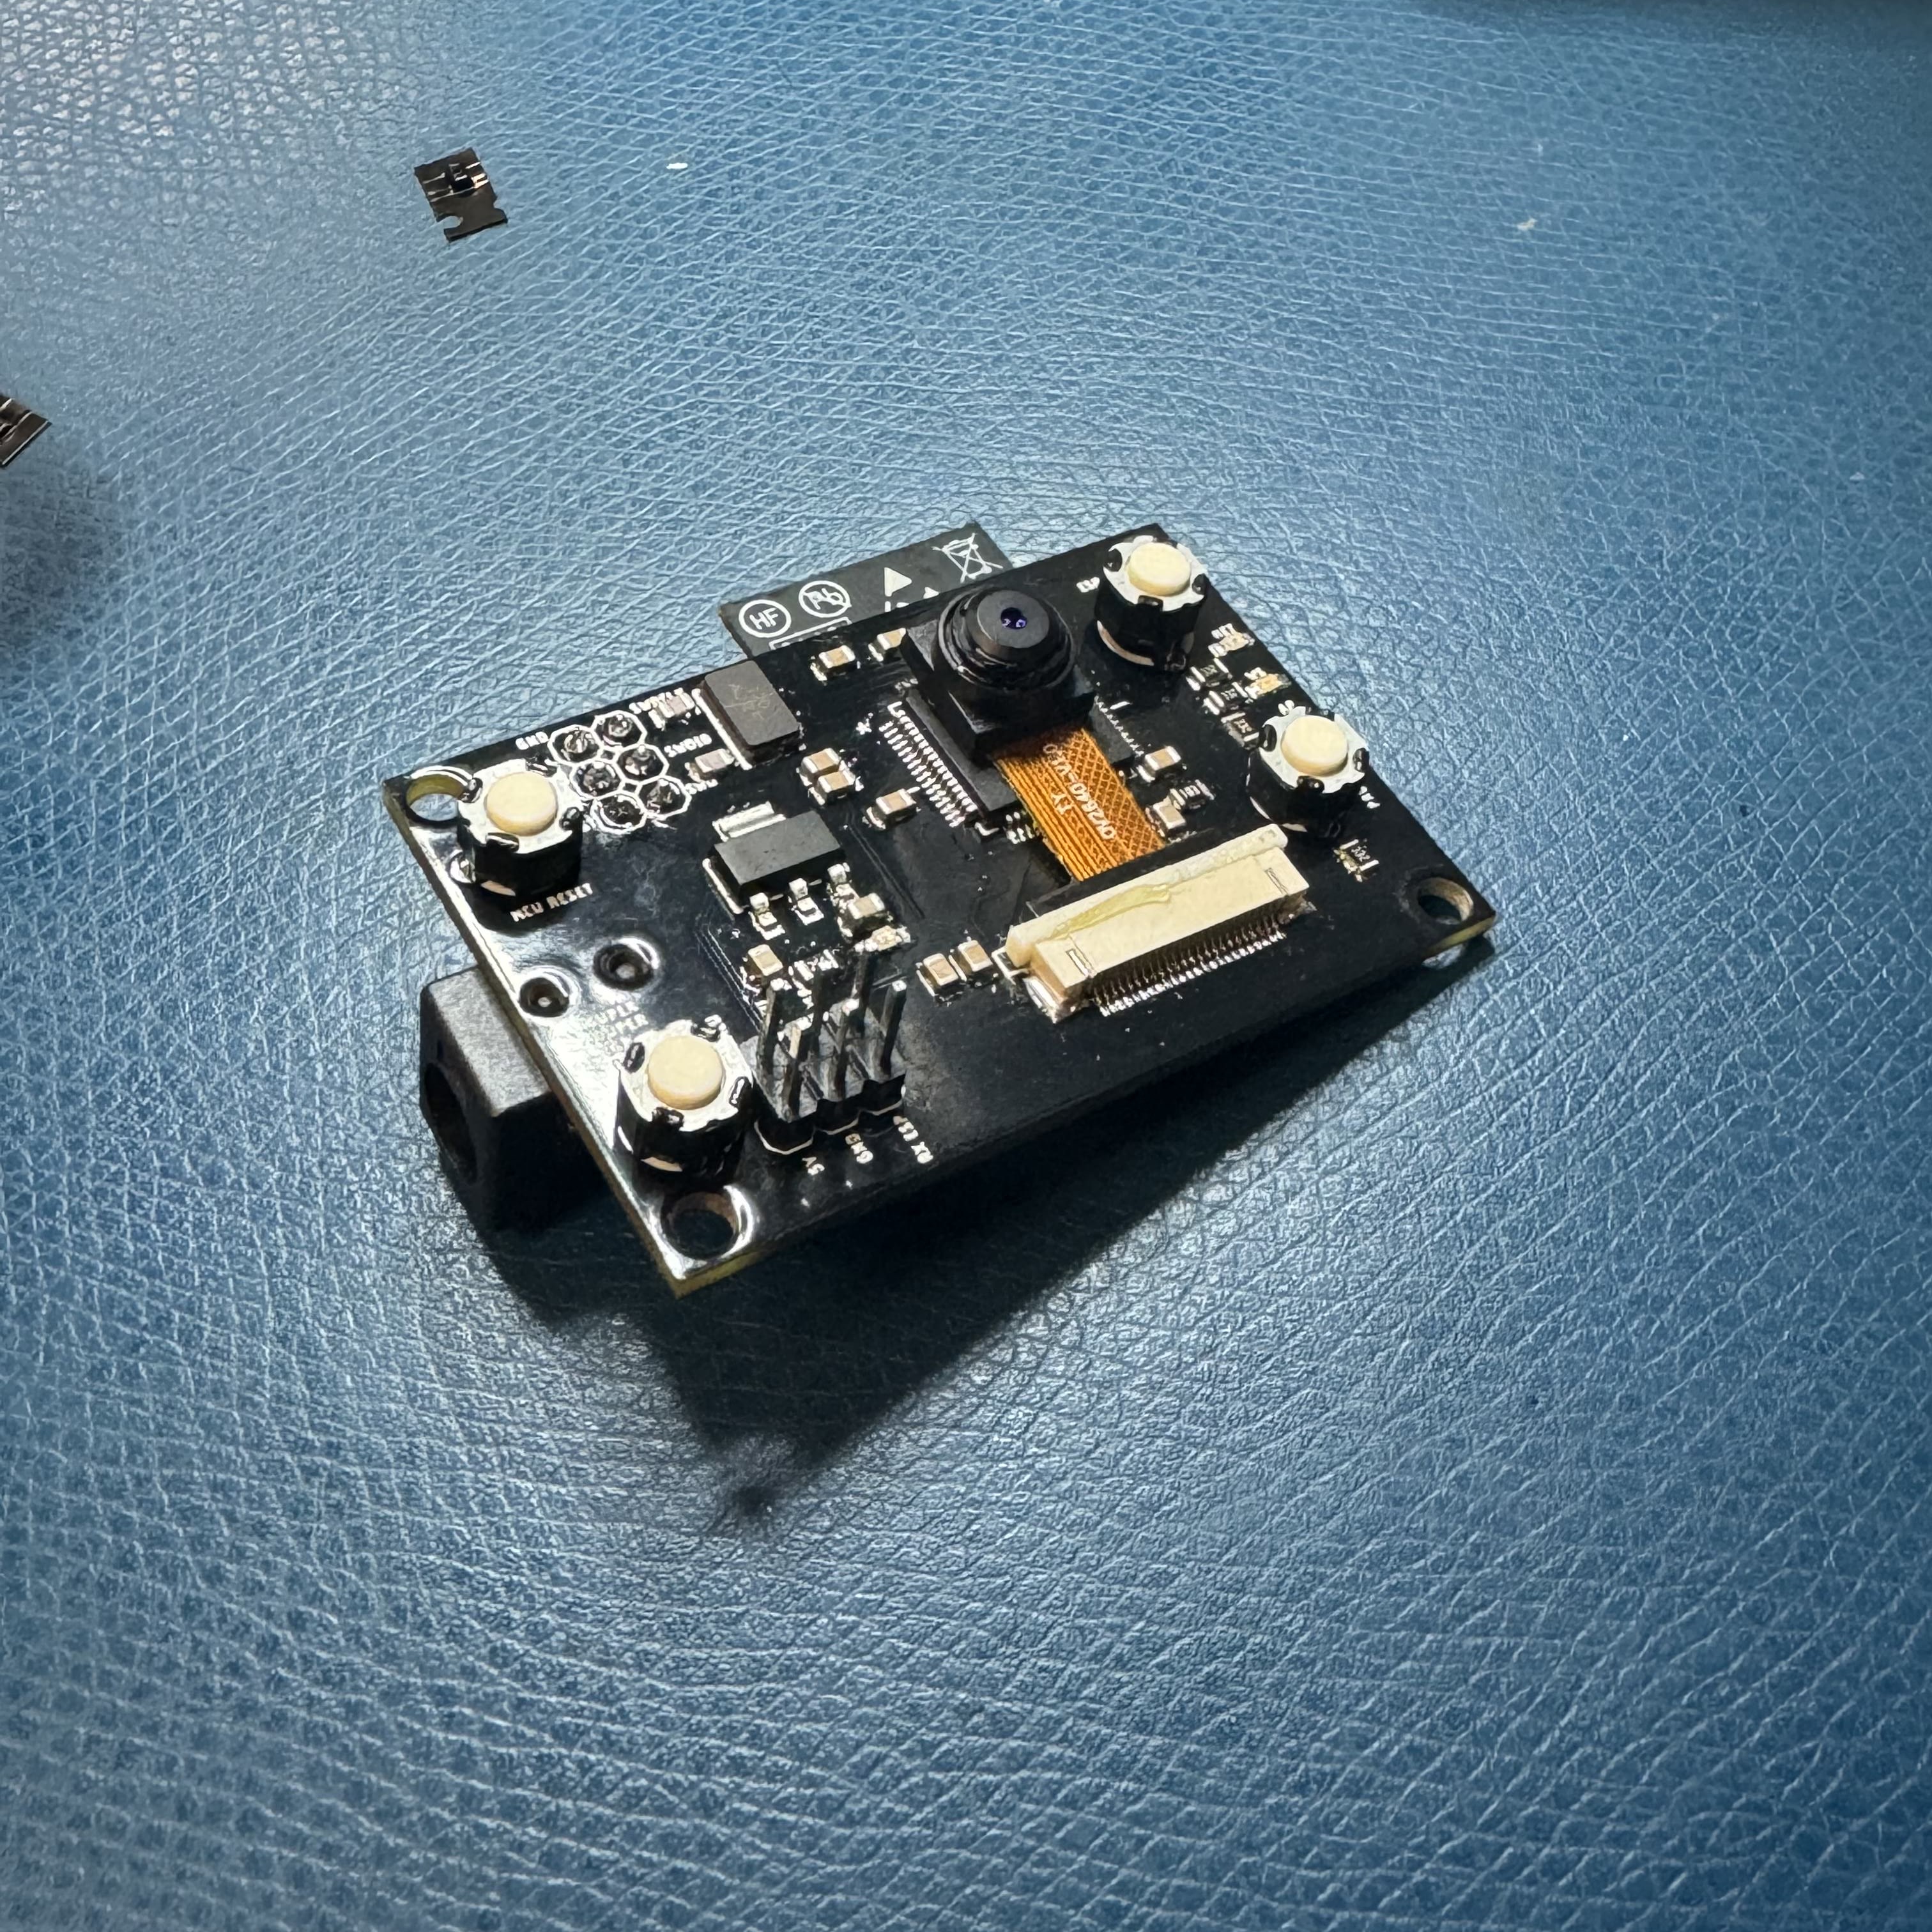
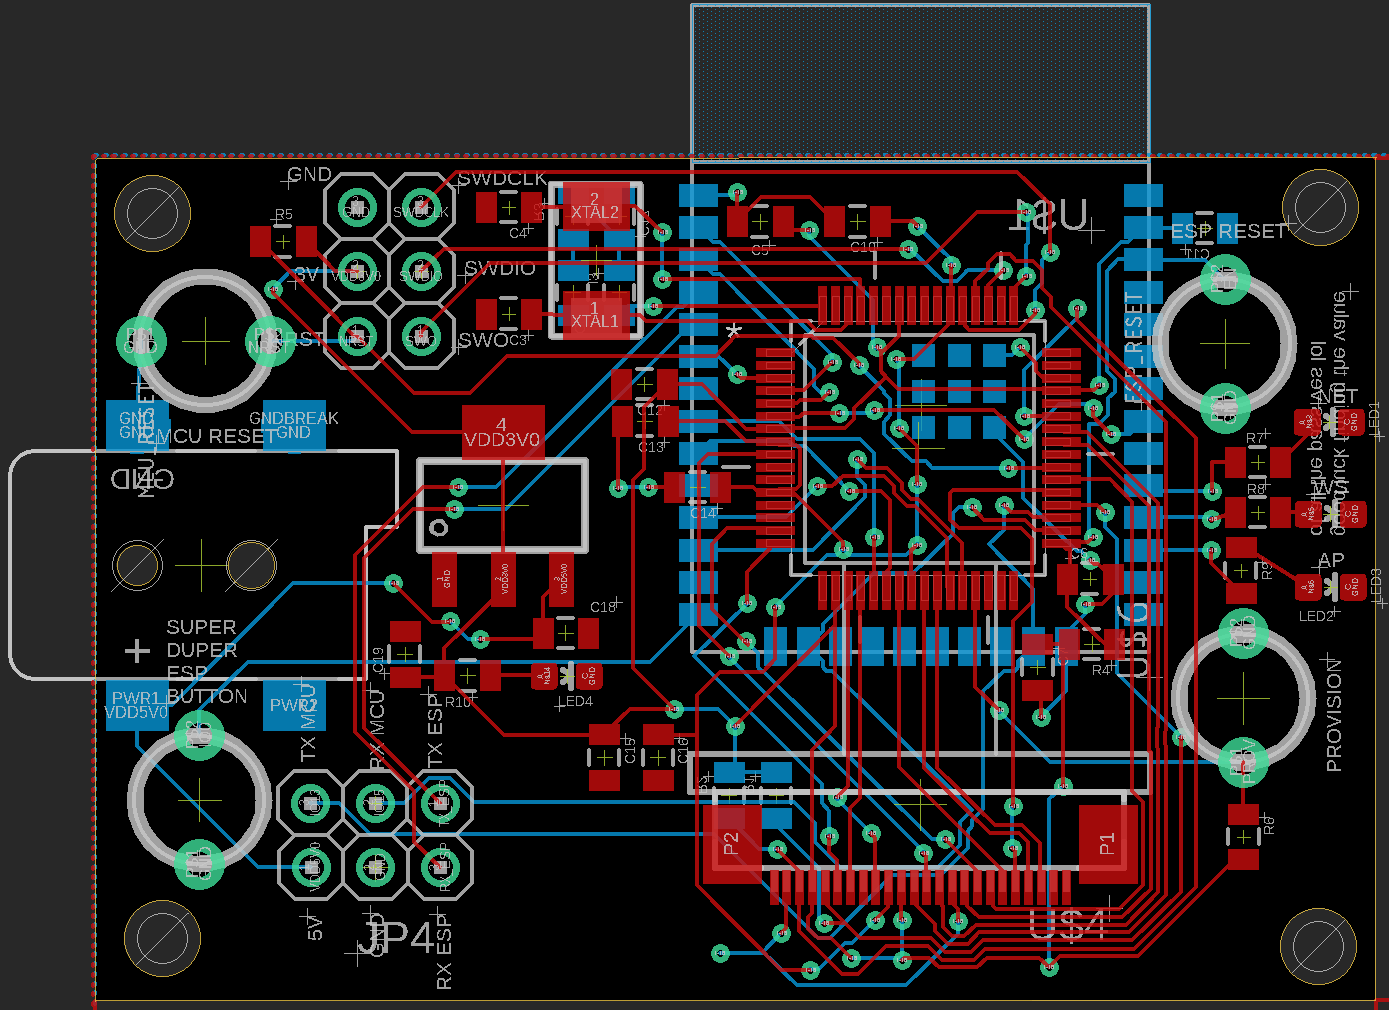 Final Webcam Layout
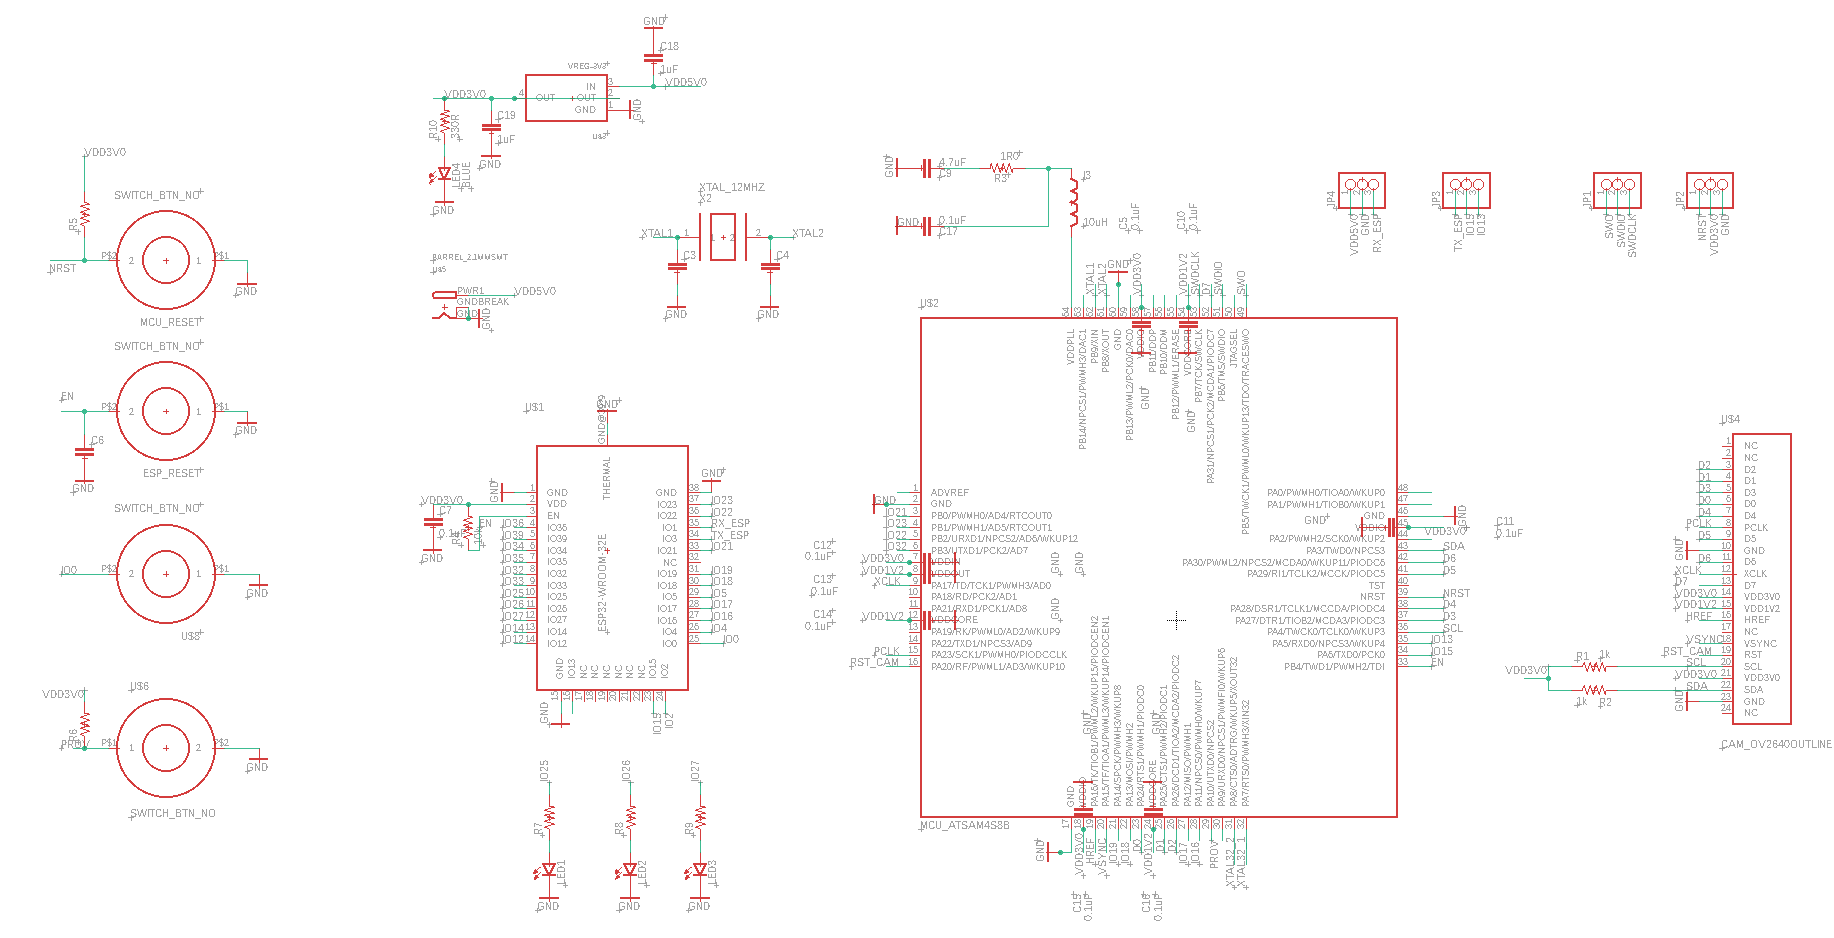 Webcam Schematic
| Physical Characteristic | Value |
|---|---|
| Layers | 2 |
| Dimensions | 50mm × 33mm |
| Thickness | 1.6mm |
| Copper Thickness | 1 Oz./ft2 |
| Substrate | FR-4 |
| Minimum Track Spacing | 4 mil |
| Vias | Tented, 0.3mm |
| Threat | Mitigation Feature |
|---|---|
| Signal Noise | Decoupling Capacitors |
| Parasitic Capacitance | Stitching Vias, Trace Spacing |
| Data Corruption | Parity Check, Short Trace Length |
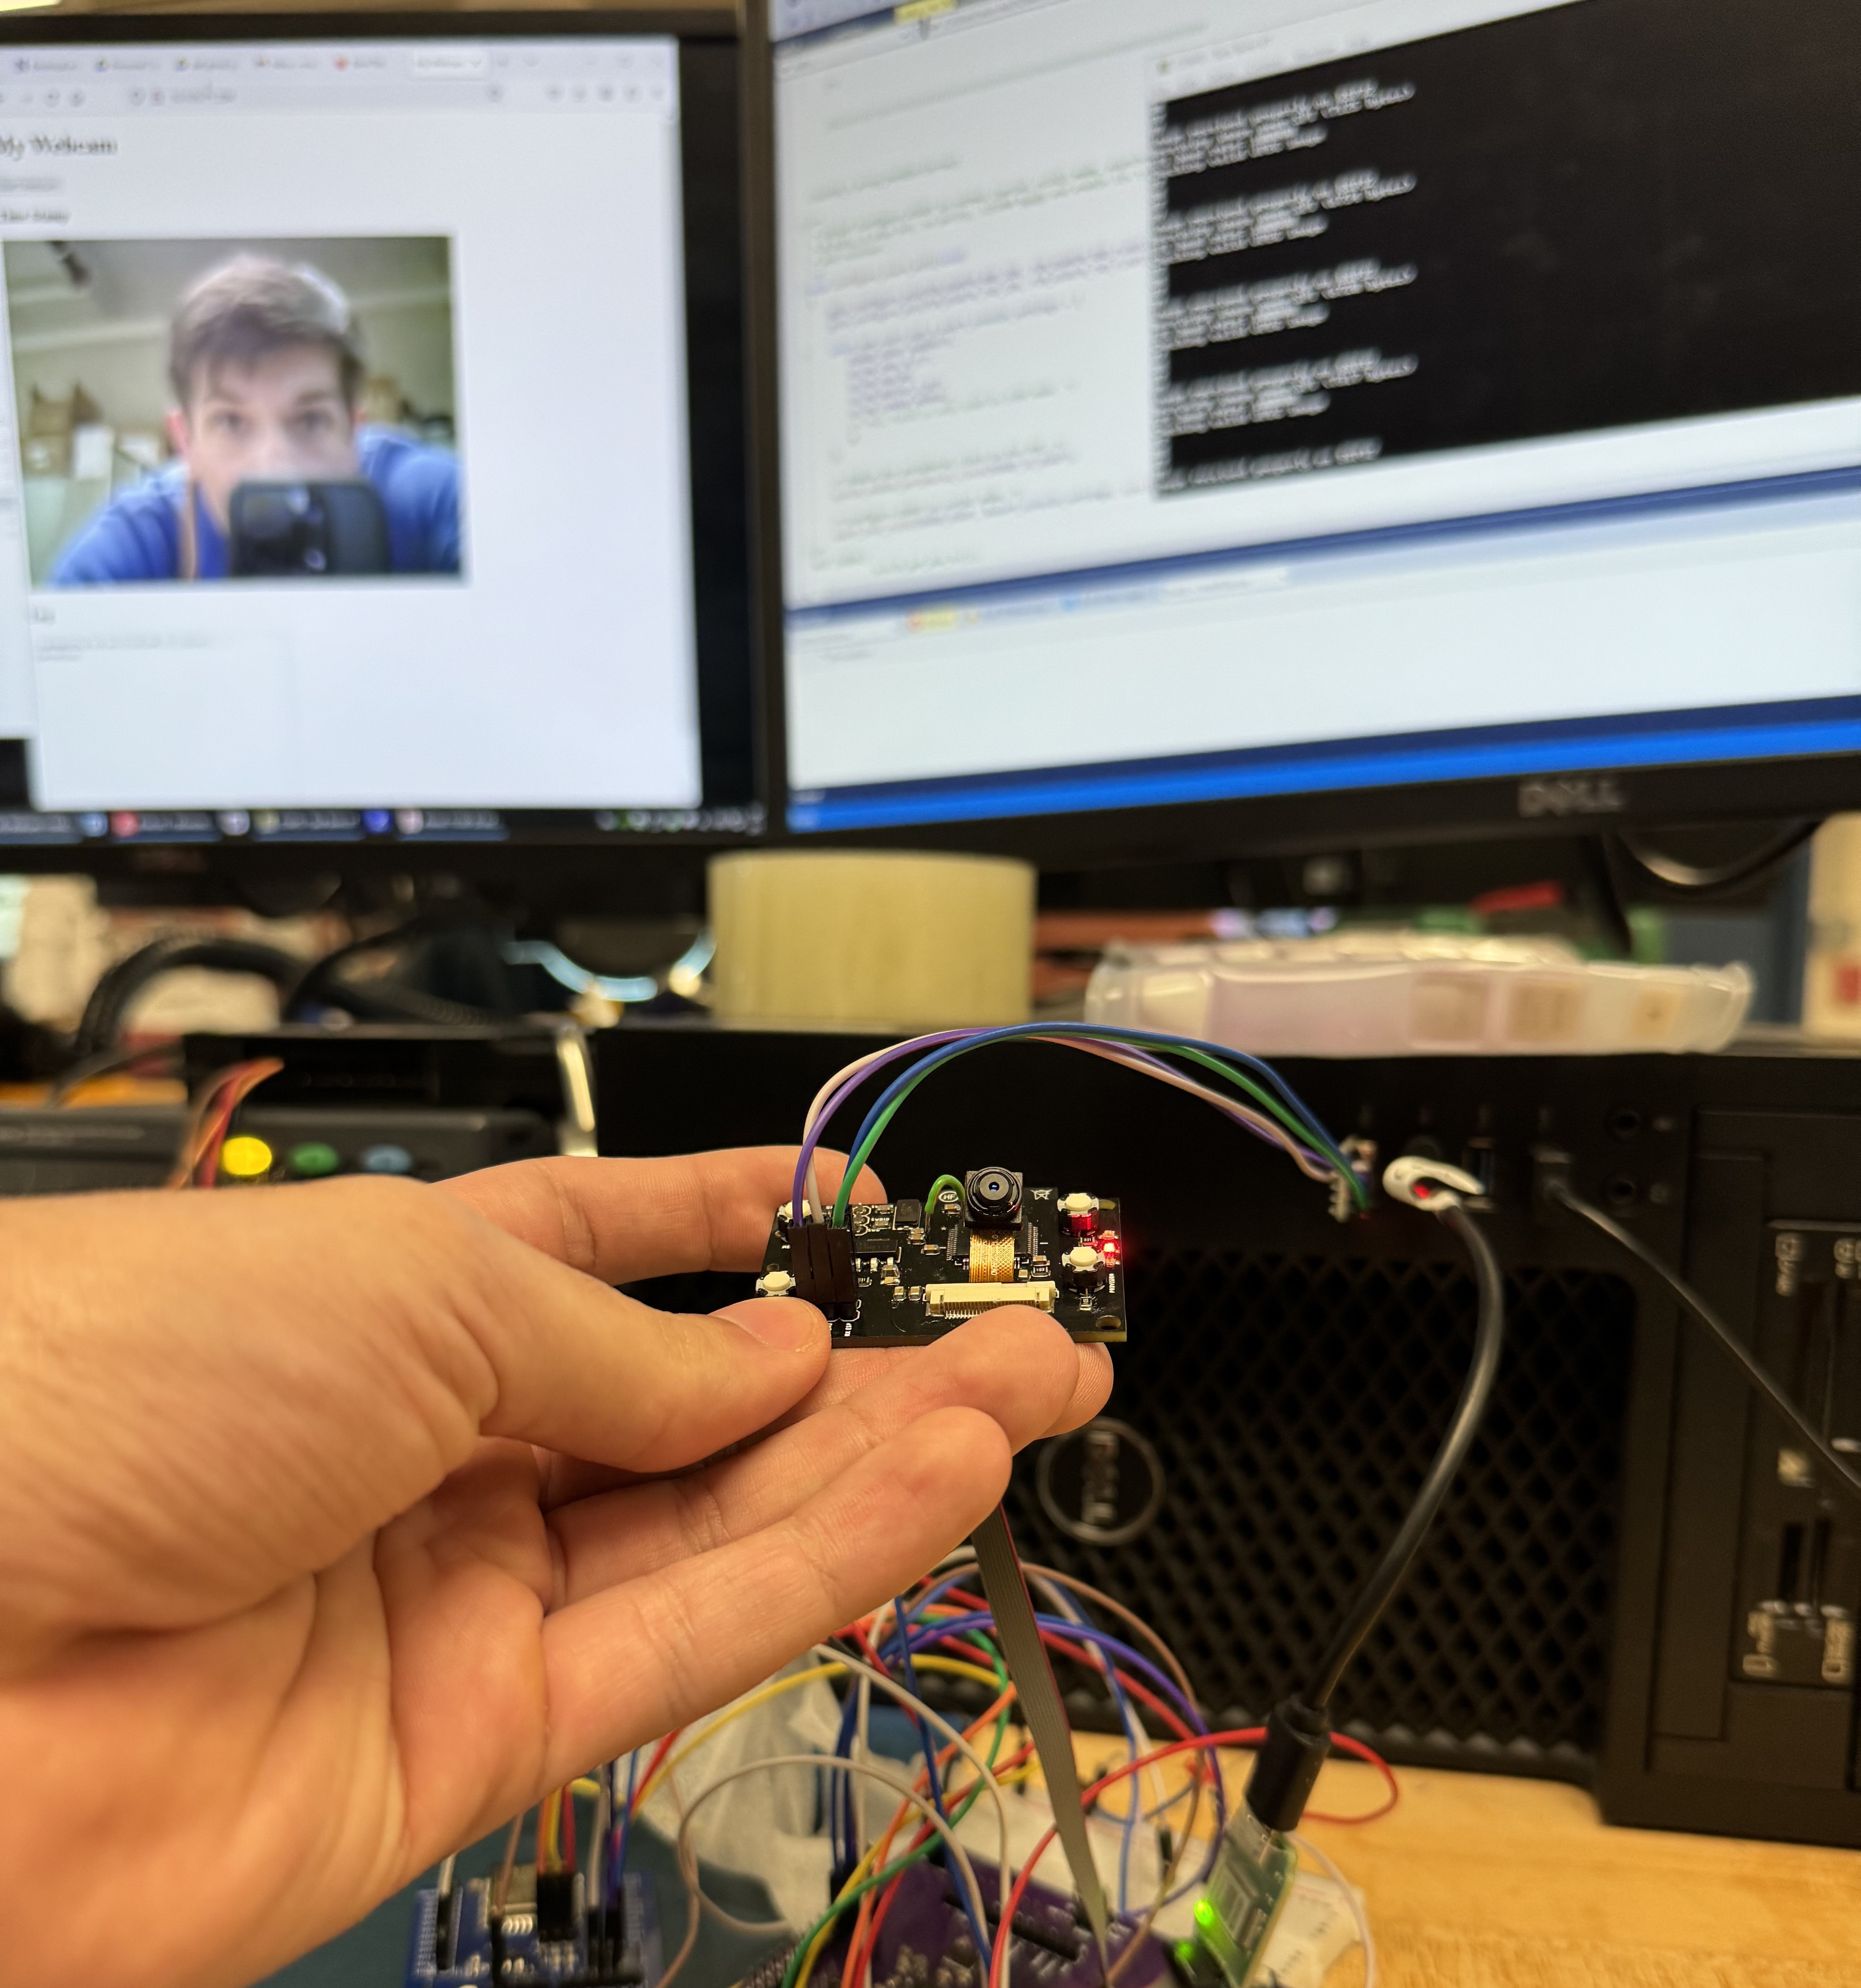 Webcam Streaming!
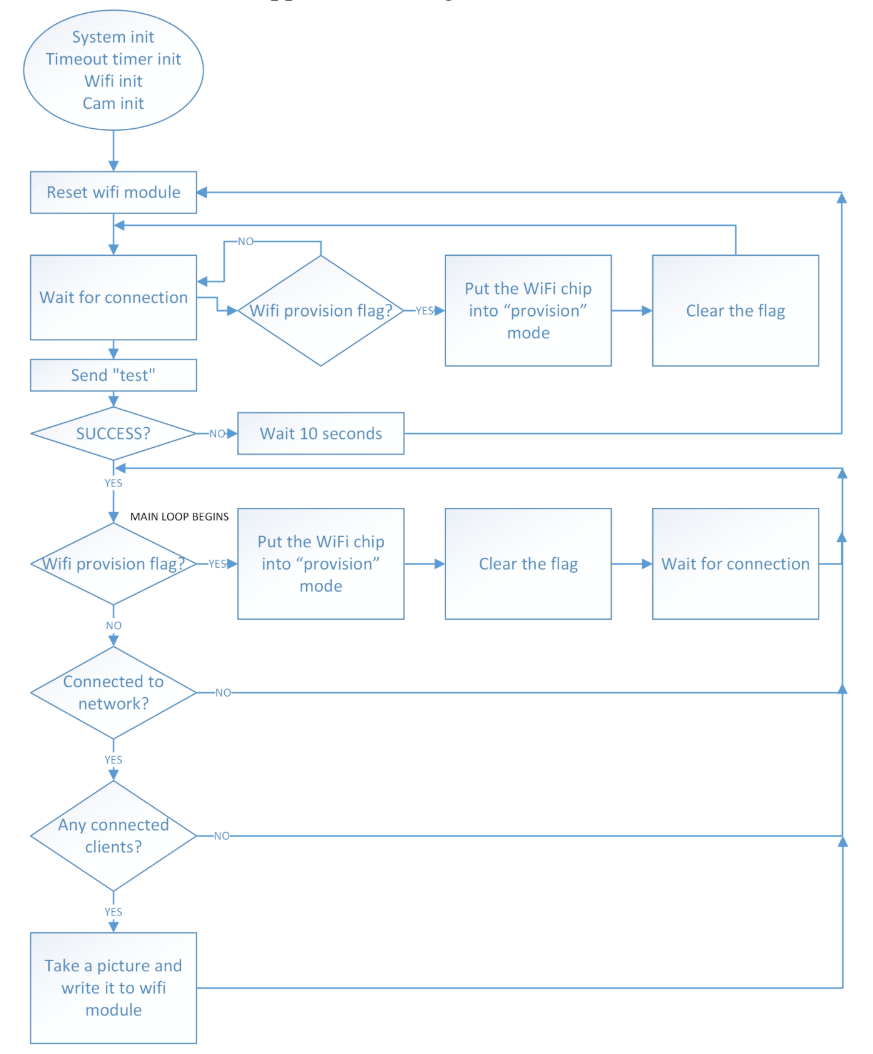 ATSAM4S8B Embedded Logic
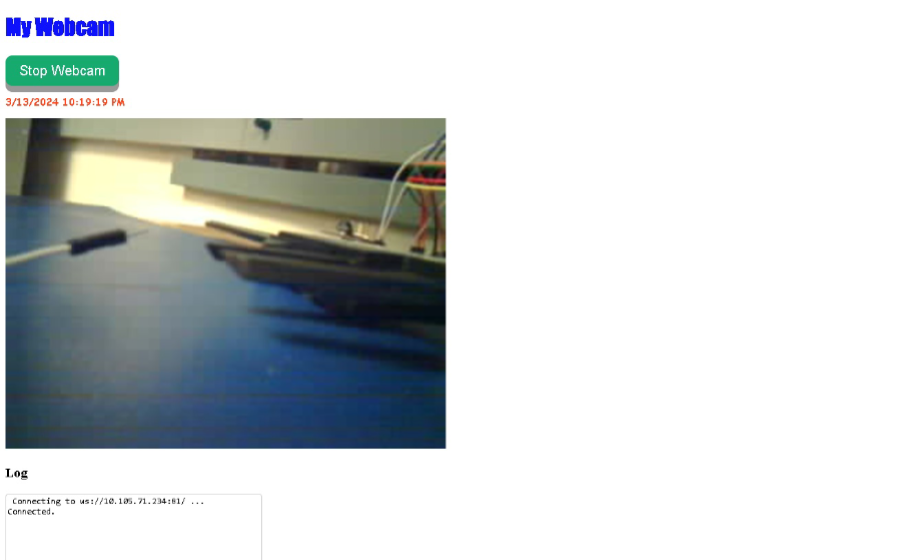 First Video Ever Streamed
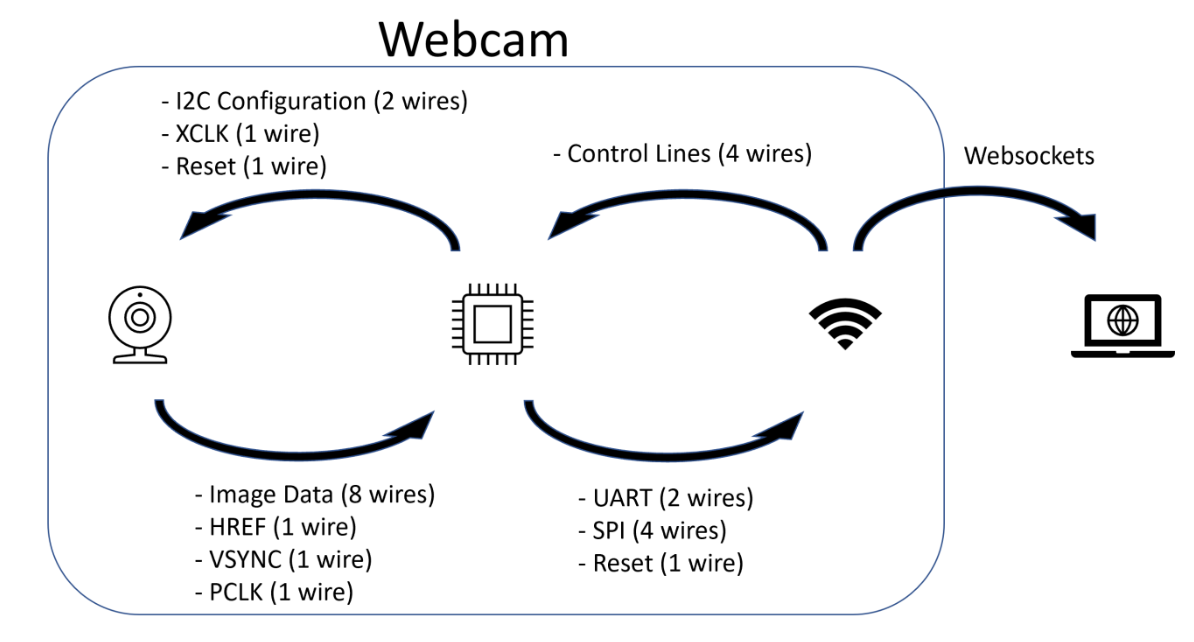 Overview of Dataflow Through System
As previously mentioned, the ESP32 module acts as a web server, hosting a responsive interface for streaming captured images. The interface features controls for starting and stopping the stream and provides real-time timestamps for captured frames. The web interface was optimized for both desktop and mobile viewing, ensuring accessibility across platforms.
I designed a 3D-printed enclosure in Onshape. The case has cutouts for the camera lens, indicator LEDs, and buttons. It also incorporates mounting options to allow the camera to be securely positioned for various use cases.
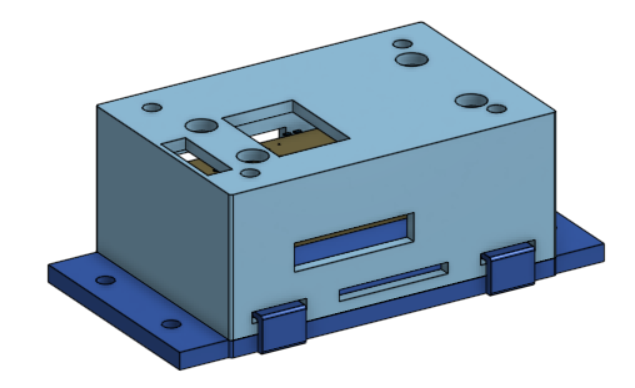 CAD of the 3D-printed enclosure